Your first animated title
Open the panel, pick a template, type your words, shape the motion, and put it on the timeline. About ten minutes, and you will have touched everything the plugin does.
1.Open the panel
On the Edit page, choose Workspace → Workflow Integrations → Textmation. The panel opens beside your timeline and stays there while you work — you never leave the Edit page.
If the menu has no Textmation entry, Resolve did not find the plugin folder. That is an install question, not a plugin question — the install guide covers the folder it must sit in.
2.Pick a template from the library
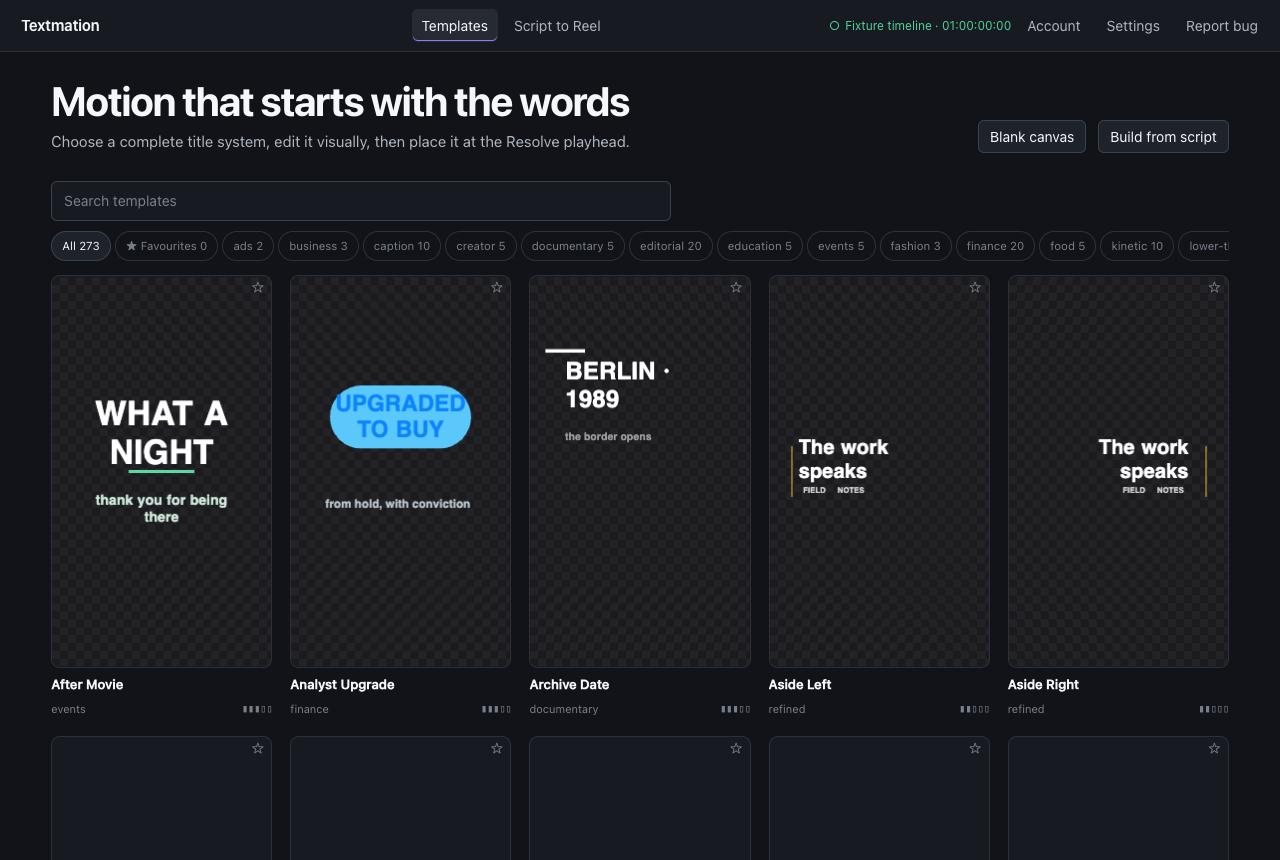
The library is organised by job — hooks, captions, lower thirds, titles — rather than by look. Search for what the title has to do (“hook”, “caption”, “sale”), or star the ones you reach for and find them under Favourites next time.
Hover any tile to watch it animate. The preview plays the real template, so what you see is what lands on the timeline. Click a tile to open it in the editor.
3.Type your words and make them yours
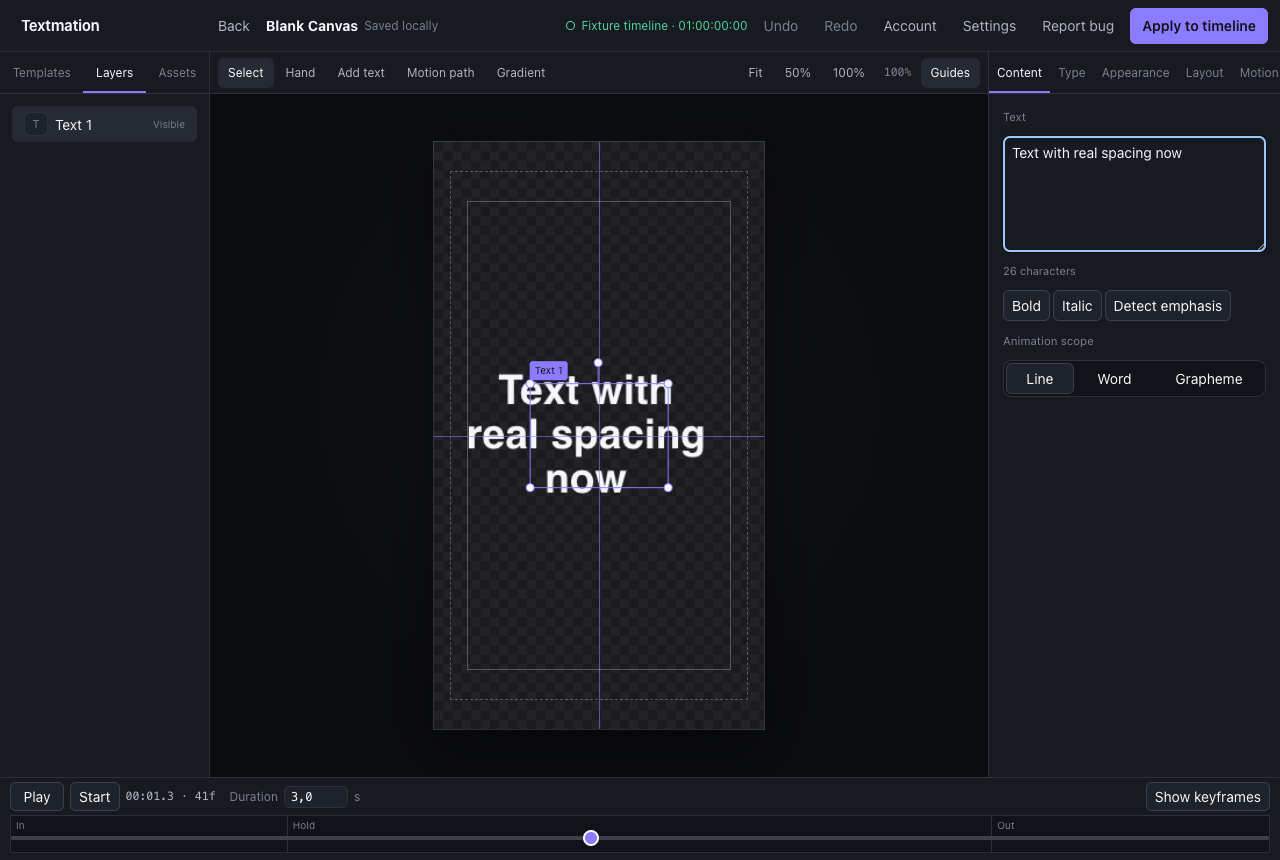
Type in the content field and the canvas preview updates as you type. Then work through the tabs: Type for font, size and colour, Layout for where it sits in the frame, Motion for how it arrives. The accent colour is the one control that changes the whole design at once — set it to your brand and the template follows.
Everything is measured in fractions of the frame, not pixels, so the same title lays out correctly on a vertical reel and a widescreen cut without a second version of it.
4.Shape the motion
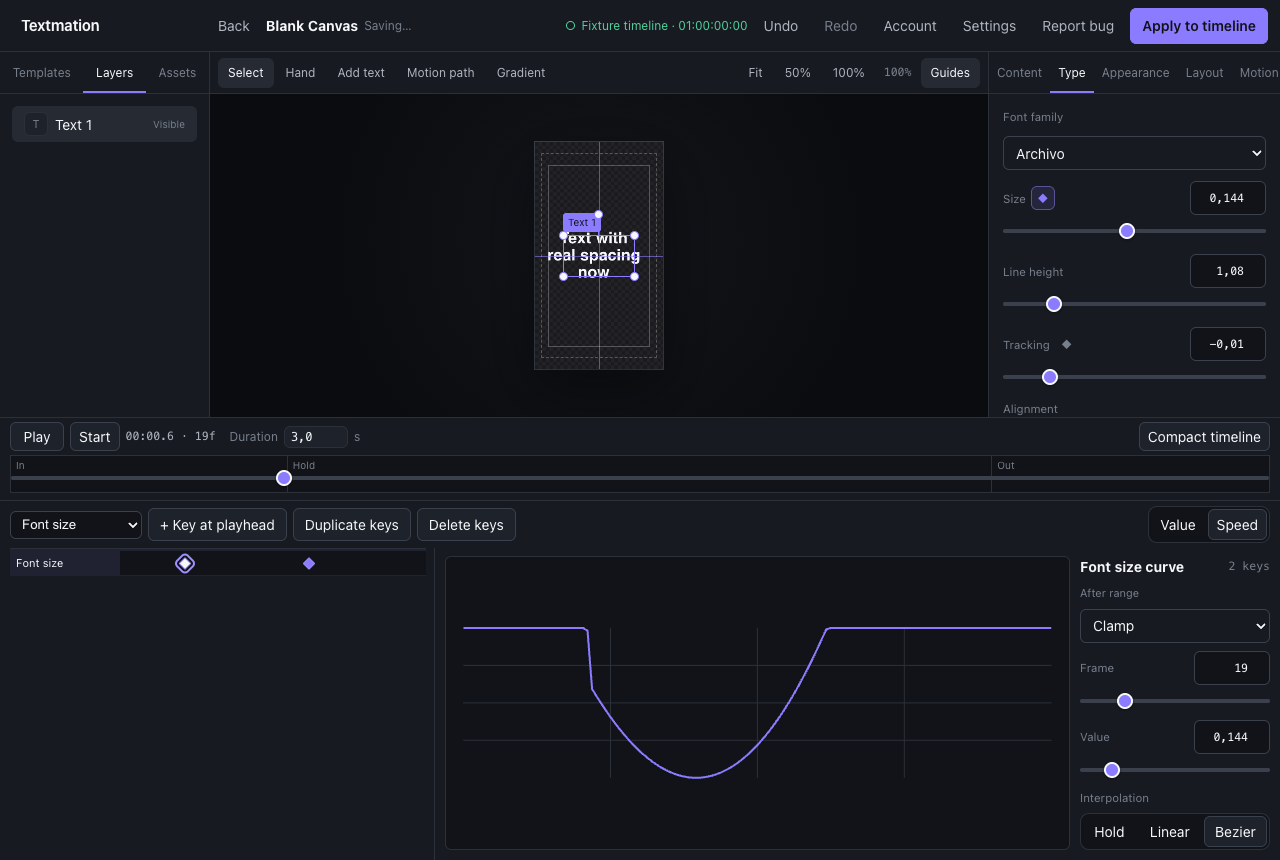
Scrub the timeline ruler to preview any moment. The In / Hold / Out bar shows how long the title takes to arrive, sit still and leave — drag its dividers and the animation retimes itself.
For finer control, add keyframes to any property with the diamond button, then open the Speed graph: drag the curve's handles, or pick an easing preset, until the move feels right. You never have to get this perfect — the next step rebuilds the title for the clip it lands on.
5.Apply it at the playhead
Park the playhead where the title should start and choose Apply to timeline. A preflight checks the title first — it will tell you if the words cannot be read in the time the clip gives them, or if the text reaches under the platform's own buttons — and then builds a Fusion composition exactly as long as the clip under the playhead.
The title is an ordinary composition. If you ever want to take it apart by hand, open the Fusion page and it is all there.
6.Change your mind later
Park the playhead over a title you applied and the panel recognises it, loads the settings you used, and offers Update title. Change a word, change the accent, apply again. Trim the clip and the title rebuilds for the new length.
The version it replaced stays on the clip for one step, so Undo puts back exactly what was there.
7.When you have a whole script: Script to Reel
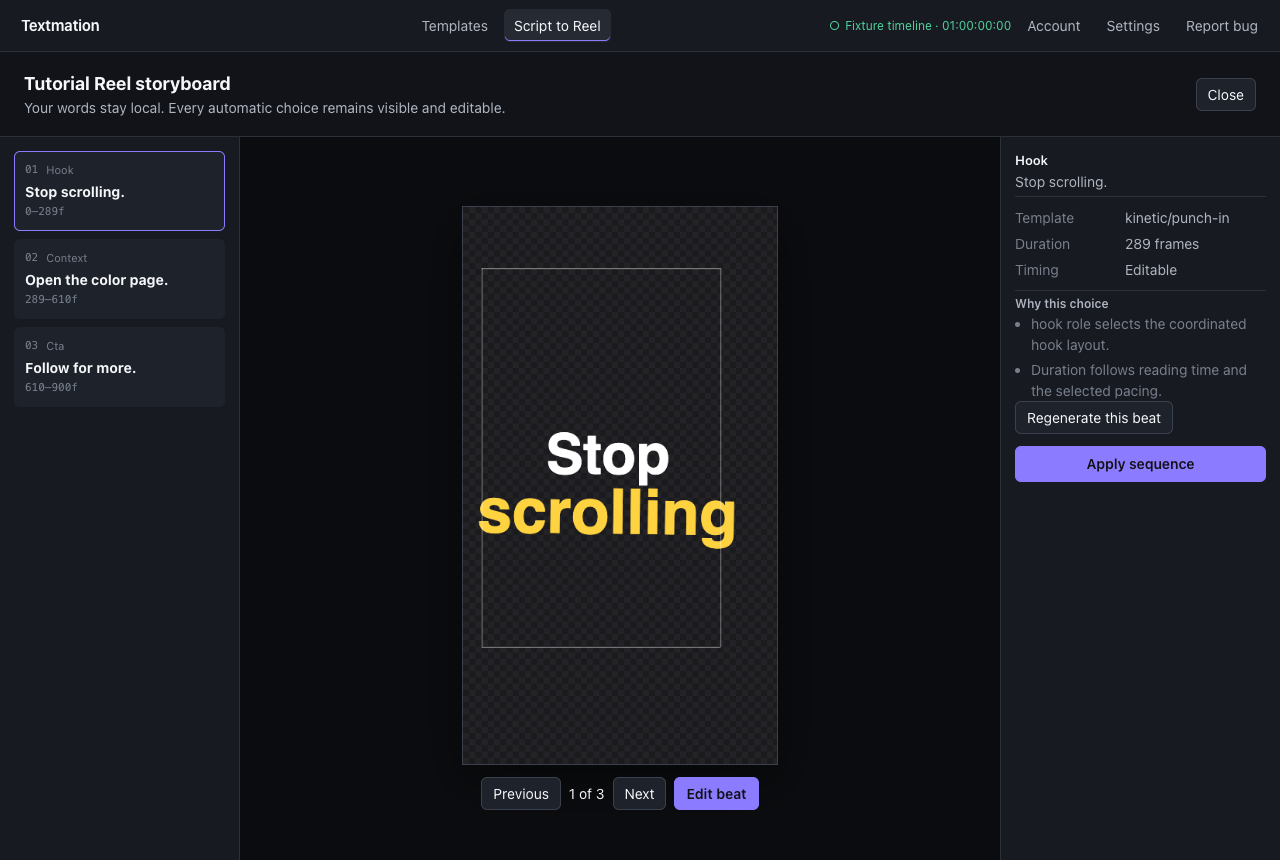
For talking-head videos, you do not have to build titles one at a time. Paste your script, review the beats it finds, choose a visual system, and generate a storyboard — then apply the whole sequence to the timeline in one go.
Keep going
- Back to the Textmation product page — what it is, what it needs, and the two things to know before you buy it.
- Something looks wrong? Use Report bug in the panel's top bar — it sends your words plus the diagnostic log straight to the people who build it.